Saturday, March 31, 2012

Bird Nest Snack Cups

The quintessential reason that I blog is to chronicle our journey as a family with backyard chickens. A close second is being able to inspire others. Teaching is a noble profession and one I highly revere. Each month, from November to April, I lead a program with my fellow Master Gardeners at our local library that reaches "Little Sprouts" from the ages of 2-7 years old. We read books, sing songs and complete a hands-on activity at each class that has something to do directly or indirectly with horticulture. The theme for the evening not too long ago was all about birds. We read three wonderful books: Birdsongs by Betsy Franco, Bluebird’s Nest written by Dorothea DePrisco and illustrated by Jo Parry, and Inch by Inch by Leo Lionni.
You can find so many great books about birds at the local library. Our library has a book sale twice a year and I always find a book or two for the girls about chickens, chicks, hens or roosters. If you are thinking about raising chickens with your family, consider doing a little research beforehand like we did. Read some chicken-themed books together. There is no better way to spark interest and excitement than with a great book!
Since spring has sprung here in north-central Pennsylvania (and is feeling more like summer!), I wanted to share a fun recipe that we used for the evening's snack. It was very tasty! I highly recommend substituting the Kashi brand cereal because it tastes incredible! How much fun would this be to make for a spring birthday celebration or Easter party? It's so easy that it would make a great afternoon snack for your little bird lovers. I adapted this recipe slightly from the blog The Adventures of Bear.
Recipe for the bird's nest snack:
2 cups shredded wheat biscuits (I used Kashi's Island Vanilla cereal instead)
1/4 cup coconut
1 tablespoon brown sugar
1/4 cup melted butter
grapes
muffin liners

Directions:
Crumble the shredded wheat biscuits into a mixing bowl. Use a spoon to stir in the coconut and brown sugar. Pour the melted butter over the shredded wheat mixture and mix together. Line muffin tin with liners. Press the shredded wheat mixture into the lined cups. Bake in a 350 degree oven for 10-15 minutes until crisp and golden brown. Let cool. Remove from muffin tin and fill the nests with grapes as eggs. Makes roughly six nests. Enjoy!

Wednesday, February 8, 2012

The Tale of the Very First and Sort of Poopie Egg

It was another exciting day for us! Our chicken, Sunshine, has just started laying eggs! With the unusually warm weather, she started laying this week. We weren't expecting her to lay until spring, since we opted against supplemental lighting to get her to lay during winter. I was able to get the girls' reaction on video this afternoon and am happy to share it with you. The egg we found today was not in the nesting box. We found it entrenched in a whole lot of poop! When Ara pulled it out, it was covered in some rather large gobs of poo. So it made me wonder: "What the heck do we do with a poop-covered egg?" I found a stellar site from Colorado State University Extensionthat explains in detail what to do. Here is an excerpt from their site that succinctly addresses our questions:
Caring for the Eggs
Collect the eggs often. Eggs that spend more time in the nest have an increased chance of becoming dirty, broken, or lower in quality. Collecting eggs at least twice daily is recommended, preferably before noon. Consider a third collection in late afternoon or early evening, especially in hot or cold weather. Coated wire baskets or plastic egg flats are good containers for collecting eggs. Discard eggs with broken or cracked shells.

Cleaning. Dirty eggs can be a health hazard. Eggs with dirt and debris can be cleaned with fine sandpaper, a brush, or emery cloth. If eggs need to be washed, the temperature of the water should be at least 20F warmer than the egg. This will prevent the egg contents from contracting and producing a vacuum. It will also prevent microscopic bacteria from being pulled by vacuum through the pores of the egg. A mild, non-foaming, unscented detergent approved for washing eggs can be used. A dishwashing liquid that is free of scents and dyes is acceptable. Eggs can be sanitized by dipping in a solution of 1 tablespoon household bleach to 1 gallon of water before storage. Dry eggs before storing because moisture may enter the shell pores as eggs cool on refrigeration.

Storage. Store eggs in the main section of the refrigerator at 35F to 40F; the shelves in the door tend to be warmer than interior shelves. If collected and stored properly, eggs can have a safe shelf life of greater than three weeks. Date the storage carton or container and use older eggs first. If you have more eggs than you can use, you can break them out of their shells and freeze them. Only freeze fresh eggs. Beat until just blended, pour into freezer containers, seal tightly, label with the number of eggs and the date. Add a small amount of salt, sugar, or corn syrup to prevent gelling and improve the keeping quality of the eggs. It’s a good idea to note any additional ingredients on the freezer container. The whites and yolks may also be frozen separately.

Preparation. Never eat eggs raw. Undercooked egg whites and yolks have been associated with outbreaks of Salmonella enteritidis infections. To prevent illness from bacteria, cook eggs until yolks are firm and cook foods containing eggs thoroughly to 160F. Use a food thermometer to be sure. Do not keep cooked or raw eggs at room temperature for more than two hours.

Here's the link to a wonderful two-page fact sheet (in PDF format) that you can print for an excellent reference: http://www.ext.colostate.edu/pubs/foodnut/09377.pdf

Here's another interesting blog post that I found with some great information on cleaning eggs:
http://www.theprairiehomestead.com/2011/10/eggs-to-wash-or-not-to-wash.html
I'm not a big fan of bleach, so I'll be skipping that option for cleaning soiled eggs.


I hope you find this post helpful in answering questions you may have about cleaning, storage and preparation of eggs.


Tuesday, October 18, 2011

Our Silkies Hatched and a Spraddle (Splay) Legged Chick

We only hatched one, lone Delaware chick from our first round of incubation a couple of months ago. Of the 12 eggs, only two fertilized and the one little guy never made it out of the egg. I figured it would be a good time to hunt for some Silkies, so our chick would have some company for the long winter that's approaching quicker than I'd like.

Silkies are referred to as the lap dogs of the chicken breeds and are exceptionally good with kids. Searching on the Internet, I found a lovely lady who runs CJ's Silkies and sells eggs about a 45-minute drive from our house. I e-mailed her and we made plans to meet so I could pick up the eggs (rather than have her mail them). She was so sweet and generous. We came home with a dozen Silkie eggs to incubate. I checked the eggs with the OvaScope egg candler after a week and seven of the twelve were fertilized! Three beauties successfully hatched out of this batch.

We have our older Delaware chick named "Sunshine," who has moved out to the new coop that's in our backyard. We really wanted to build a coop from scratch, but I've been pretty sick lately and unable to help Derek out. Instead, we bought a coop kit off eBay for $300. It was pretty pricey, as we had only budgeted for $150 in materials to build our own, but it was out of our control ... so we gave in and bought it.

Surprisingly, it was simple for Derek to put together and seems to be well-constructed for being an import. It took only a couple hours and the instructions were straightforward. The coop looks nice and should accommodate about three to four full-grown hens. I hope we'll build a larger coop with a bigger run ourselves in the spring. We have our plans for that coop still and some of the supplies ready. It's something we both want to take on when I'm feeling up to it! Derek had a great idea to add handles to the coop and retrofit wheels from our defunct jogging stroller so we can move it around the yard. I hope we'll be able to do this before the snow flies. Otherwise, it will be a springtime to-do!

A word of caution: Be very careful buying anything online! Do your research and make sure to carefully read the feedback for a seller and know their policy if the item arrives damaged or there are missing/broken pieces. Some sellers only give you a matter of days to let them know if there is a part missing or broken. There are a lot of shysters out there, so exercise caution and do not rush to buy anything. Take your time to carefully consider your purchase and read everything about the product listing very carefully. Simply put, buyer beware!
Our third Silkie to hatch had some difficulty with spraddle legs. Luckily, I ran into information online about this when I was reading up for our first chick. The poor little thing could only do splits and just couldn't get its footing to walk around. Scooby-Doo Band-Aids to the rescue! I liked the pictures from this site that illustrate how to fix a chick's spraddle legs.

It's essential you remedy this problem in the first few days so the chick can get a good start and train its legs to stay together. This process would have gone flawlessly except for the fact that Silkies have hairy legs! Derek held the poor little thing while I attempted to affix the bandage around each leg. We were successful after a few minutes of careful maneuvering. Afterward, the chick took a long and well-deserved nap. Two days later, the bandage started to come loose and he or she is doing well on their legs ... and no more splits! If the problem continues when the bandage starts to fall off, you have to apply another bandage.

I've also noticed that this same chick appears to have a slightly herniated belly button. I am just careful to not bother it while it heals. I had to pay careful attention cleaning its back end when its feces became stuck to its feathers. I didn't want things to get infected, but I also didn't want to get that spot wet when I was loosening the feces. It's really important to check on your chicks every day. They may need cleaning, as their feces can get stuck to their feathers. I just used a warm, wet paper towel and held it to the feces if it was stuck to their feathers. It hasn't happened often, but it's not something you want to let go and hope it resolves itself.

The temperaments of the Silkie chicks are incredible! Nora was holding one and it nuzzled up under her neck, closed its eyes and started to take a nap. It was one of the moments that simply melt your heart!

With three chicks in the brooder, we are able to observe the pecking order play out. The two oldest are vying for head honcho. They are like the three stooges trying to poke each other in the eye or nip at each others' legs. The other strange thing that you don't find in the books is the way these crazy chicks sleep. The two darker ones love to sleep on their sides and stick their feet in the air. I glanced at the brooder and it took my breath away. I figured, "Oh no! It's dead!" After closer inspection, I saw it was happily snoozing away and its little legs were twitching in some slumber-induced dream. Phew! They have since stopped napping like this and it's put me at ease.

Sadly, our white Silkie passed a couple weeks later. I'm not exactly sure what happened, but I tried desperately to do whatever I could to save her. She just all of the sudden ran out of steam and was listless. I called my neighbor friend and the local Agway to see if they could give any advice. There really wasn't much else I could do. I was told it just happens sometimes all of the sudden. Nevertheless, it was a sad day for us all. It's just really hard to accept that I couldn't make the poor girl better.

In the coming weeks, Derek will have a blog about dressing chicken. We had the awesome opportunity to learn to safely and humanely butcher a chicken (thanks to our friends at Spring Meadows Farms, who hosted a recent field day).

Monday, August 22, 2011

Our New Feathered Friend

Early Saturday morning was a special day for our family. One of our chicks hatched out of its egg!


The night before, I could see the egg moving and hear little peeps. We also noticed a small crack in the side of the egg. Bleary-eyed, the girls crowded around and peered into the incubator's observation windows.


There was so much excitement and lots of, "I cannot see, move over, let me loooook!" The chick was in the egg still, but well on its way to getting out. The chick would peep and they would go bonkers! "Did you hear that mama? The chick is peeping!" The girls' eyes were like saucers, taking it all in. They would clap their hands and giggle. Good times! We let the chick stay in the incubator most of the day while it dried, and we were hoping it would encourage the other one to come out. Sadly, our second chick never hatched, so we have one chick from our first incubation.


We were certain that the second chick didn't make it, because the next day the egg smelled really bad and there was no movement. Unfortunately, the rest of our eggs didn't get fertilized, or maybe something else happened in the incubation process. As we're newbies at this, I hoped maybe I was wrong when we candled. It was clear that there was nothing but a yolk, but I kept them in there just in case I was wrong.


The evening before, Derek and I set up the brooder for the chick. We had a cardboard container from the starter kit for chicks from Tractor Supply, but I had seen a better way to house them. I had a large plastic storage container used to store clothes for the kids in the closet. I've been downsizing, and a bin worth of clothes went off to charity. I lined it with paper towels. The towels are necessary so the chick can get good footing. I also read it's a better choice than wood shavings to start because the chicks cannot differentiate between food and wood shavings and may accidentally eat some of the shavings. I'll replace the towels with wood shavings in a couple of weeks.


The University of Minnesota has good information about the hatching and brooding process for small batches of chicks. We filled the feeder with the supplied chick starter (again from the Tractor Supply kit) and I used distilled water for the water feeder. I'm worried about our well water and just want to give the little gal (or guy) the best start. I sprinkled a little of the feed on the paper towels near the feeder, to make it easy for the chick to find.


I attached the heat lamp to a cast iron plant stand I have. The literature I read said to get the light about 18" above the brooder. I was shooting for a temperature of 95 degrees F. I checked the temperature with the thermometer from the incubator and laid it on the floor of the brooder. It was right around 100 degrees. I adjusted the lamp up a few more inches until I was around 95 degrees F. Other ways to tell if your temperature is off is to watch the chick. If it stays away from the light, it might be too hot, so adjust the lamp further way. If the chick constantly stays under the light, it might be too cold, and you will want to move the lamp closer. Make sure your brooder is away from cold drafts and protect the chicks from your pets. We are laying a window screen over top of the brooder for added protection.


It would have been nice to have a friend or two for the little chick, but we are giving him or her lots of attention. The girls talk sweetly to the chick and sing it songs. Ara loves to tell it, "I'm your mama and I'm going to take good care of you." It took a while for the chick to dry out, but it seems to be doing really well and really bonding with the girls. As you can see from the pictures, the little chick is dearly loved and off to a great start.


We want to raise our chicks organically, but decided to start with medicated feed to give our chick a good start. We'll switch over to organic feed next month. I also took the time to disinfect the incubator, so I hope we can start one more small batch. That way, our little chick will have a friend for the long winter months ahead.


Candling with an Ova Scope

The Brinsea Ova Scope came a couple of weeks ago! We opened it up, followed the supplied directions and checked out our eggs that very day.

I'm a little worried now. Out of our 12 eggs, I can definitely see two chicks moving around ... but nothing in the others. They have been incubating for 11 days. Could it really be that only two out of the 12 made it?

The good news is I can see the air sacs in almost all of them. Maybe I'm wrong about the eggs, so I will persevere by keeping them in the incubator. I may have a mess on my hands if one or two explode, but I hope that won't happen and we'll get more than two chicks.

I found a very useful site that provides videos and pictures of candling chicken eggs at the University of Nebraska-Lincoln. It's perfectly all right to take the eggs out of the incubator, but not usually longer than 30 minutes. Make sure your hands are clean when handling them. You don't want to clog the pores in the egg shell.

The girls thoroughly enjoyed seeing the chicks moving around in the egg! They kept vying for a turn. Over and over again they peeked inside the scope to see the chick wiggling around inside its egg. It was pretty neat to see how excited the girls are getting about the chicks.

Egg Perched on the Ova Scope
There were two eggs we threw out after candling because we knew absolutely nothing was going on inside. Also, they both had a slight crack in the side we hadn't noticed before. Derek cracked them open back by our creek and there was no embryo growth in either.

I was also able to plop my camera upon the scope to get a video of the chick moving around in the egg:


Wednesday, August 3, 2011

Incubating the Chicks!

It's been a while since our last blog entry, but an exciting new chapter in the Furry household unfurls as I write! The countdown has begun. In roughly 14 days, we will hear the peeping of little chicks. (The gestation period for chicken eggs is 21 days.)

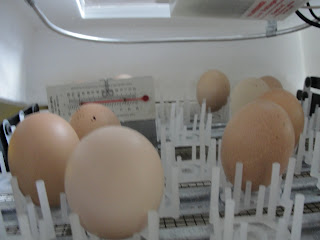
We have an incubator all set up and we now have eggs! We went to our local farmer's market last week to arrange a pick up of our dozen Delaware eggs at the rock bottom price of $2.50 from our friends Mike and Chris Chester at Always Somethin' Farm. They were kind enough to let us borrow a great little book called "A Guide to Better Hatching" by Janet Stromberg. It's out of print, but you may be able to locate a used copy online. I found another excellent site that was created by the University of Illinois Extension. It gives helpful information explaining the operation for a still air incubator (excellent for us, as we do not have instructions for the one we are borrowing from our aunt). Our incubator has an automatic egg turner too. Our aunt has used it many times in her classroom over the years as a first-grade teacher. We received a new thermometer before using it because they lose there accuracy over time, and temperature is an essential part of incubating correctly.

Our aunt gave us some great pointers so we could get the incubator setup correctly:
  • A well (called the moisture channel) inside the bottom of the incubator holds water to keep the eggs moist.
  • Each egg nestles into cradles, and the eggs need to be placed skinny point down. The airspace in the egg is at the largest and widest part of the egg.
  • Two windows allow for checking the temperature, which we set as close to 99.5 degrees as possible. Temperatures vary according to the type of incubator you have, so do the research before using your particular incubator.
Another pointer our aunt gave us was to watch for excessive moisture buildup on the windows. If we see that, we pull one of the red vent plugs to air the incubator out a little. Our eggs are currently rocking away, and we're so excited to see what hatches.
We also picked up a chick starter kit at Tractor Supply for about $20. It has a waterer and food feeder, a small bag of chicken feed starter, a box to put the chicks in for safe transport, a little cardboard corral for them to safely play outside (supervised) and some coupons for chicken-related products at the store. We also picked up a heat lamp and light bulb for it.
We are getting to the point were we can check the eggs and toss out the bad ones. I purchased an Ova Scope after reading Jennifer Sartell's awesome blog post reviewing the Brinsea Ova Scope. I scoured the Internet for a good deal on the scope. It's a large expense at $70 with shipping, but I think the girls will really enjoy being able to see their chickens growing inside the eggs and we will use it again. It will also be fun to share with our friends and family when the eggs are hatching too. We'll have a blog for you about that in the next week or two and a video of the chicks inside their eggs (we hope)!

We still have no coop, but we'll report on that, too, as we press forward. A couple of weeks ago, we received some great freebies for the coop from my godfather, which I'll post about soon. He also helped us with the coop design and supply list. We should be able to make our coop, which includes a fenced-in run, for about $100. Not too shabby. I'll be keeping track of the receipts as we buy our supplies to see how close we come to hitting the mark!

Saturday, May 28, 2011

Planning the Coop is All Washed Out!

I had to chuckle when Nora and I were watching the Cat in the Hat on PBS one morning. The Cat and the children were talking about bird nests and wanted to build one on their own. The fish smugly commented, "You don't know how to build a nest!" In the sage words of the Cat in the Hat, "I don't know how to now, but I will when I'm done!"

That's the mantra we have to follow to succeed with our daunting coop planning project. It will take time, lots of weekends, but it will be done just in time. We won't be incubating until June so warm (hopefully drier) spring and summer days are ahead of us for building.

If the rain would stop for one weekend, we could really get started on our coop. I can't complain too much, because I planted most of my early spring veggies last weekend and now I don't have to worry about watering them! The next seven days are all forecast for scattered thunderstorms. Such a bummer, and raincoats aren't my idea of a fashion statement! We're itching to get started, so I may have to just take a few rainy days and clean the garage out well so we can start building in there instead. I looked through several books with my husband, Derek, and we decided to start with a coop to accommodate up to 10 chickens. This way we have room to grow and add to the flock next year.

On the bright side, I went to our local library book sale last month and scored a bunch of books for the girls about chickens! I put the books in their Easter baskets and they continually pick chicken-themed books for our bedtime stories.

I also found some nifty wind-up chickens that lay bubblegum eggs for the girls' baskets. It was such a hit!

At my last visit to the library, I stumbled upon a really awesome book that I wanted to share with those out there with little ones. It's called Egg to Chicken/Tadpole to Frog (Flip Me Over) (QEB Life Cycles).

Emu at Reptiland
The book does an excellent job of explaining and defining essential terminology like nesting, brooding, parts of the chicken, what happens inside a fertilized egg and how it hatches.

What's even better, you flip the book over and the other half explains the lifecycle of tadpoles to frogs! The book appealed to both our daughters (almost 3 and 6 years old). Nora, our youngest, enjoyed the pictures and asked questions, while Ara grasped more and asked really thoughtful questions. The book had a picture of an ostrich and its egg, and she remembered her visit last month to Reptiland where they had emus.

She wondered if emu eggs where close to the size of ostrich eggs. I was impressed that she made the connection! This book was certainly apropos.

On a recent visit to our friend Bonnie's house, she gave us frog eggs to take home. Nearly every egg hatched and we now have a little two-gallon tank bustling with tadpoles!

One other book that I checked out of the library turned out to be wonderful for younger ones. It's called Dora's Eggs. It's a board book and the illustrations are great. I looked online and the library version appears to vary a lot of from the retail version.

We were also lucky this past week to meet Bonnie's daughter Raisa's ducklings! As you can see from the pictures, the girls doted on the ducklings and had a blast!

I was really pleased that Raisa allowed the girls to play with the ducklings. As I expected, there were a few ducklings that were a bit tenuous with two young, independent-minded girls!

Nora and Ara held the ducklings, watched them swim in the pond and followed them around as they quacked! Raisa paddled in her kayak with the ducks on the pond and watched after them carefully ... as any mother hen would!

We also checked out their coop. It was a great experience for the girls and it was awesome for us to watch them interact with the ducklings!